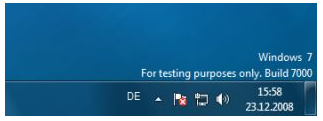
Many users are asking how to remove evaluation copy (Or testing purpose only) watermark that appears on the bottom right of Windows 7 desktop. Generally, we need to edit system file to make it happen. But thankfully, we have a simple, clean and working patch that does the job perfectly.

Before getting into the innards of the guide, it’s better to backup your system files since you are going edit user32.dll.mui system file using a small patch. Follow the steps given below to remove watermark from the Windows 7 desktop.
Procedure:
2. Right-click on Removewatermark (.exe) file and select Run as administrator. Make sure that you have chosen RemovewatermarkX86.exe file, if you are using 32-bit Windows. Likewise choose RemovewatermarkX64.exe for 64-bit Windows.
3. Next, a command prompt will be opened asking your permission to continue. Press/type “Y” to continue patching process.

4. Within few seconds, a successful message will be shown. Close Command Prompt window & reboot your system.

5. Enjoy!
If the watermark appears even after rebooting the machine, then follow the procedure below.
1. Type CMD in Start menu search field and hit enter Ctrl + Shift + Enter to open Command Prompt with admin rights. Alternatively, go to Start > All programs > Accessories. Right-click on Command Prompt entry, and select Run as administrator.
2. In the Command Prompt, type in mcbuilder.exe and hit enter. It may take a minute to finish the process. Now, close the Command Prompt window and reboot Windows 7.

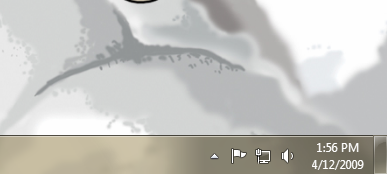
3. You should see no watermark on your desktop now.
Note that this patch should work fine on all builds of Windows 7 including build 7057.
Đây là chương trình dùng để xóa Watermark trên các phiên bản Windows Vista / Windows Server 2008 / Windows 7.
Ví dụ như "Evaluation Copy", "For testing purpose only", "Test Mode", "Safe Mode".
Đặc biệt: chương trình nhỏ gọn hỗ trợ tất cả các phiên bản beta từ cũ đến mới nhất của Windows 7.
Cách dùng rất đơn giản, giải nén ra một thư mục, chọn phiên bản 32bit / 64bit tương ứng rồi chạy chương trình với quyền quản trị, ấn y để bắt đầu chương trình.

Sau đó bạn chỉ cần Log Off / Restart là hiệu lực ngay.
Nếu sau khi Logon trở lại mà vẫn ko được thì bạn chỉ cần chạy lại một lần nữa chương trình, ấn R, sau đó khởi động lại máy và phép màu đã xảy ra...
Ví dụ như "Evaluation Copy", "For testing purpose only", "Test Mode", "Safe Mode".
Đặc biệt: chương trình nhỏ gọn hỗ trợ tất cả các phiên bản beta từ cũ đến mới nhất của Windows 7.
Cách dùng rất đơn giản, giải nén ra một thư mục, chọn phiên bản 32bit / 64bit tương ứng rồi chạy chương trình với quyền quản trị, ấn y để bắt đầu chương trình.
Sau đó bạn chỉ cần Log Off / Restart là hiệu lực ngay.
Nếu sau khi Logon trở lại mà vẫn ko được thì bạn chỉ cần chạy lại một lần nữa chương trình, ấn R, sau đó khởi động lại máy và phép màu đã xảy ra...

No comments:
Post a Comment